lbh notebook – stationery and design insider tips & info
Notebook
Uncategorized
paper post: custom wedding paper timeline
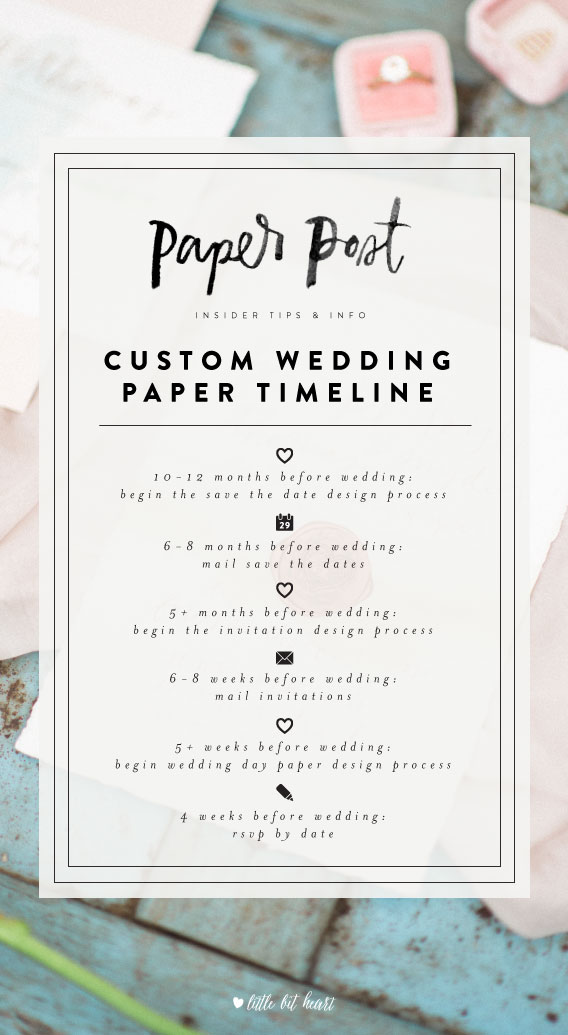
From save the dates to wedding day paper, these are the guidelines we frame around (of course, there are exceptions) for our custom clients; other stationers may work with a different timeline. Here are the basics:
10-12 months before your wedding: You’ll (hopefully!) be working with the same stationer throughout your wedding paper, so this is a great time to start making inquiries and getting the save the date design process started.
6-8 months before: mail out save the dates (for a destination or holiday wedding, you may want to send these out earlier).
5 plus months before: the invitation design process gets underway (for us, we ask for the invitation retainer prior to getting the design process started). This is when your stationer becomes your best email friend! Designs are created, critiqued and refined to the final stage. Your supply orders will be placed and your design will go to print. The remaining balance may be due at final proof approval (this is about 7 weeks before the mailing date for us).
6-8 weeks before: mailing out your invitations! We work with 8 weeks. The structure is a little like dominoes, each date depends on the one before it:
So if you wedding date is September 8…
your RSVP date would be around August 8 (domino: this date usually depends on when your caterer or venue needs the final headcount)…
and your invitations would be mailed around July 8 (domino: If you’re having a destination or holiday- like New Year’s Eve- wedding, or if you have a lot of out of town guests, you’d want to get your invitations out sooner).
There are other factors that may affect your timeline, but this will at least give you an idea of what to expect. Happy planning!
OH HI, LOVELY ENGAGED FRIEND! NEED MORE DETAILS?? JUMP ON THE LIST FOR OUR FREE EMAIL SERIES, “INVITE TO RSVP”- THE COMPLETE BLUEPRINT FOR EVERYTHING YOU NEED KNOW ABOUT WEDDING INVITATIONS AND WE’LL WALK YOU THROUGH THE WORDING, STYLE, PRICING, TIMELINE, PIECES + MORE. RIGHT THIS WAY:
background image: joy michele photography
Uncategorized
on wedding details
Weddings are a big deal.
You have wedding blogs, and wedding magazines, and wedding vendor blogs and wedding vendor magazines. There are inspiration boards for the colors, the flowers, the jewelry, the wedding party, the clothes, the table, the invitations, the photography.
So here it is: if you want them, all of these things matter. All of these things are little tiny pieces of the whole that are going to make the day YOURS. And you know what makes all of these details shine? The love that goes over and underneath and above all of them.
Next time you see a gorgeous wedding online, take a second to read (we know, we know. We look at the pictures first too) the text- why they chose that theme or that tradition or those flowers. If you still think the details don’t matter much after that, you’re reading the wrong blogs. Because there are blogs for every kind of wedding- the modern, the offbeat, the vintage, the handmade… you just need to find yours.
For us, it’s a little more than sad to read these articles lately that say details don’t matter, or this or that trend is so over or so last year.
Well, we’re so over hearing couples question themselves because they think that everyone has a photobooth or uses vintage china- if you love it, do it! Unless your guests are professional wedding guests (is this a possibility? If so sign us up!), they have no idea about “wedding trends” or the next big wedding thing. They just see a couple in love. If you think guests are standing in the hall talking about how the photobooth guestbook idea is sooo last year, someone needs to tell the guy who posted it on Facebook with the caption “Best idea ever. So ___ + ___.” True story.
We’re so over couples feeling judged because something they want is in all the wedding magazines right now. Or because it’s not.
So for all the engaged couples out there: it’s okay to want details. It’s okay to not want them- sometimes the detail that makes it so you two, is that there aren’t many. It’s okay to want something that just so happens to be the trend right this second- your love will make it timeless. It’s okay to think that detail you keep seeing is ridiculous and you would never.
It’s all okay- you’re getting married, and it’s your day. So do it up, and don’t let anyone let you feel bad about any of it.
background image: joy michele photography
Uncategorized
paper post: wedding websites

The registry information…
The super long accommodations info that just wouldn’t fit on the Save the Date…
The who’s who of the bridal party that needs a ton of space…
Your proposal story that’s so sweet, but doesn’t fit in the program… guess what all these are?
Prime candidates for your wedding website.
Think of your wedding website as an extension of all your pretty paper: it’s a great place to share additional information that won’t work or fit on your printed pieces. Here are our tips for how do it and what should go on yours!
Where to start? The Knot and other similar sites have easy and free website builders for you to use- but your customization options are limited to their templates. Nearlyweds and Minted offer beautifully designed templates- you can pay to upgrade to premium features, but they do have limited plans that are free. Appy Couple has gorgeous templates for websites and a coordinating app (how twenty first century!)- pricing is a one time fee that starts at $39.
Looking for something a bit more custom? Customizing a Blogger or WordPress.com site theme with your own graphics, colors and fonts might be the way to go. Want a cohesive look? Ask your designer if they customize wedding websites or if they could create web graphics for you to use.
It’s a good idea (ok, traditionally- it’s a must) to keep your registry information off your invitation- so if you’re registered, you’ll want to include that information on your website. Other things that may not fit on your invitation set that are shareworthy on the website: extended directions and accommodations information, your proposal story, your wedding party, and all those cute pictures of you two!
Having a destination wedding or expecting a lot of out of town guests? Load your wedding website up with fun local information, sites to see, and links from your city to explore.
background image: julie lim photography
Uncategorized
free printable :: produce buying guide 2015
Even though I personally LOVE doing the grocery shopping (I know this is weird), it drives me nuts that the produce section can be so overwhelming. Besides keeping fruit around ALL THE TIME for Havi (I seriously think this kid eats like a teenager), we’ve also been buying more produce for Whole30 compliant or paleo dinners lately, so it seems like I’m spending a lot of time in the produce department these days! Trying to choose just right fruits and vegetables is one thing- I pick them up to examine and I pretend I know what I’m looking for ha- but my biggest worry is figuring out what’s best to buy organic, and what to skip.
That’s where Environmental Working Group’s Shopper’s Guide to Pesticides in Produce™ comes in: this list highlights the “Dirty Dozen” (go organic) and the “Clean Fifteen” (conventional’s ok) fruits and vegetables, and really helps you figure out where it’s most worth it to spend more for the organic versions if you want to do that.
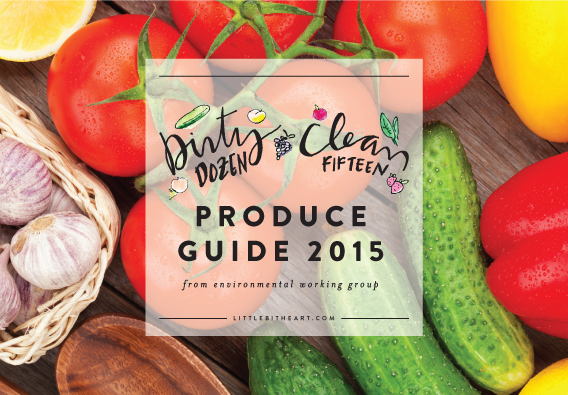
They just updated the list for 2015, so we’ve updated our free printable of the produce guide (available here) as well! We didn’t notice any major updates from last year’s list, but we couldn’t resist the chance to do a new design since we look all this on the fridge all year :) I know I’m always taking screen grabs and pictures of things I want to remember, so we also included a version (available here) that you can use as your phone wallpaper or save to your photos so it’s always handy.
Happy shopping!
Design © Little Bit Heart – for personal use only